Contents
Is it true that replacing garage door springs can be a straightforward DIY task? While many tackle this project themselves, there are critical steps and safety measures you must follow to avoid accidents. Understanding the types of springs, gathering the right tools, and ensuring safety precautions are in place are just the beginning. Let’s explore the essential tips that will make this process smoother and safer for you.
Key Takeaways
- Identify the type of springs (torsion or extension) before starting to ensure you have the right tools and materials.
- Always wear safety gear, including gloves and goggles, to protect against injuries during the replacement process.
- Disconnect the garage door opener by unplugging it or switching off the circuit breaker for safety.
- Test the garage door’s functionality after installation, checking for smooth movement and proper alignment to prevent strain.
- Maintain a clean workspace and keep children and pets away to reduce the risk of accidents during the replacement.
Understand the Types of Garage Door Springs
When you’re considering garage door spring replacement, it’s essential to understand the different types of springs available. The two main types are torsion springs and extension springs.
Torsion springs are mounted horizontally above the door and work by twisting to lift the garage door. They’re known for their durability and ability to handle heavier doors, making them a popular choice for many homeowners.
On the other hand, extension springs are located on either side of the door, extending and contracting as the door opens and closes. They’re typically easier to replace but may not offer the same longevity as torsion springs.
Choosing the right type depends on your garage door’s weight, usage frequency, and your personal preferences. Understanding these differences will help you make an informed decision and ensure your garage door operates smoothly and safely.
This knowledge empowers you and fosters a sense of belonging within the DIY community.
Gather Necessary Tools and Materials
Preparing for a garage door spring replacement requires gathering specific tools and materials to ensure a smooth and safe process.
First, determine your spring types—torsion or extension—since this affects your tool selection. For torsion springs, you’ll need a winding bar, an adjustable wrench, and a socket set. If you’re working with extension springs, have a safety cable, pliers, and a ladder ready.
Don’t forget safety gear like gloves and goggles to protect yourself during the replacement. A sturdy workbench or surface can also help keep your tools organized and accessible.
It’s essential to have a replacement spring that matches your current springs’ specifications, so double-check measurements before purchasing. Finally, a pair of locking pliers can secure the door while you work.
Having these tools and materials on hand ensures you’ll feel confident tackling the project, fostering a sense of accomplishment and belonging in your DIY community.
Ensure Safety Precautions Are in Place
Before you begin replacing the garage door springs, it’s essential to confirm all safety precautions are in place. Start by wearing appropriate safety gear, including gloves and goggles, to protect yourself from potential injuries. Springs are under immense tension, and a sudden release can be hazardous.
Next, establish an emergency plan. Inform someone about your project and make certain they know how to assist or call for help if needed. This step creates a safety net that’s vital during this task.
Make sure your workspace is clean and well-lit, reducing the risk of accidents. Keep children and pets away from the area, as their presence can distract you and increase danger.
Finally, double-check that you have all tools on hand before starting. By following these safety measures, you’ll create a secure environment, allowing you to focus on the task ahead and ensure a successful garage door spring replacement.
Disconnect the Garage Door Opener
It’s important to disconnect the garage door opener to ensure safety while replacing the springs. This step is vital for effective garage door maintenance and ensures that you can work without the risk of the door moving unexpectedly.
Start by locating the power source for your garage door opener; it’s typically a plug or a circuit breaker. Unplugging the unit is the safest method, but if you prefer, you can also switch off the circuit breaker to cut power.
Next, you’ll want to pull the emergency release cord, which is often red and hangs from the opener. This action allows you to manually operate the door, separating it from the opener mechanism.
Always double-check that the opener is completely disconnected before proceeding. Prioritizing opener safety protects you during the spring replacement and contributes to the overall longevity of your garage door system.
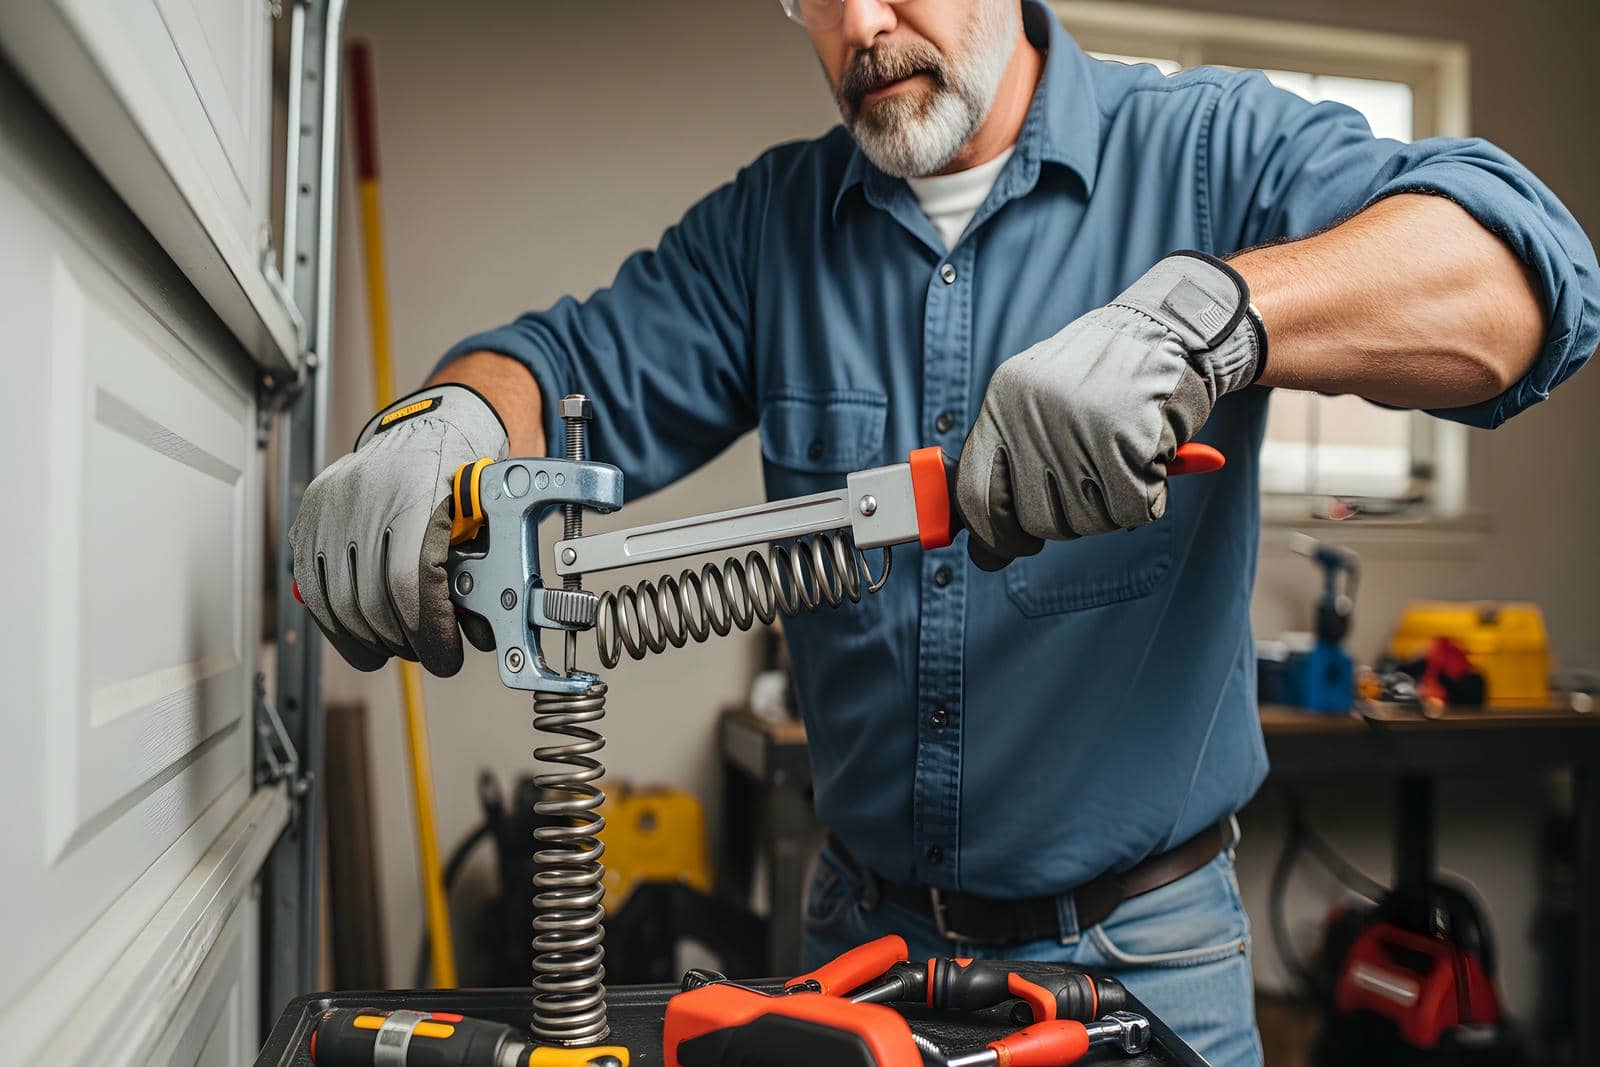
Remove the Old Springs Carefully
Before you start removing the old springs, prioritize your safety by wearing appropriate gear, including gloves and eye protection.
Make sure you have the proper tools on hand, like a winding bar and a socket wrench, to handle the task effectively.
Carefully follow the manufacturer’s instructions to avoid accidents as you remove the springs.
Safety First Practices
Removing old garage door springs can be a dangerous task, and taking safety precautions is crucial. Before you start, make certain you wear appropriate safety gear, including gloves and safety goggles, to protect yourself from potential injuries.
Always work with a partner; you’re less likely to encounter issues when someone’s there to assist. Familiarize yourself with emergency procedures in case something goes wrong, like a spring breaking unexpectedly.
Confirm the garage door is fully closed and secured before beginning the removal process, as this reduces the risk of accidents.
When you’re ready to remove the springs, handle them carefully and keep your body clear of the tensioned area.
Prioritize safety, and your spring replacement will go much smoother.
Proper Tools Required
To successfully remove old garage door springs, you’ll need a few essential tools to ensure the process is efficient and safe. Here’s a quick overview:
| Tool | Purpose |
|---|---|
| Wrench | To loosen and remove bolts |
| Safety glasses | To protect your eyes during removal |
| Torque wrench | To adjust spring tension appropriately |
Depending on the spring types—torsion or extension—you’ll need to adapt your installation techniques. A wrench will help you tackle the bolts, while safety glasses will make sure you’re protected from any flying debris. Using a torque wrench allows for precise adjustments, making certain your new springs are installed correctly. Master these tools, and you’ll feel a sense of accomplishment and belonging in your DIY community.
Install the New Springs Properly
Once you’ve chosen the right type of springs for your garage door, it’s essential to install them correctly to ensure peak performance and safety.
Begin by releasing any existing tension in the old springs. Carefully attach the new springs to the brackets, making sure they’re securely fastened. Pay close attention to spring tension; improper tension can lead to malfunction or damage. Adjust the tension by turning the winding cones, but always do this in small increments to avoid over-tightening.
Next, check the alignment of the springs. Misalignment can cause uneven lifting or stress on the door. Use a level to verify that both springs sit evenly on their shafts.
After making alignment adjustments, double-check all hardware for security. Proper installation enhances your garage door’s functionality and ensures your family’s safety.
Test the Garage Door Functionality
Testing the garage door’s functionality is crucial after replacing the springs, as it ensures everything operates smoothly and safely.
Start by confirming proper door alignment; a misaligned door can strain the new springs, leading to premature wear. Open and close the door manually to check for any resistance or wobbling. If the door feels heavy or sticks, it might indicate an issue with spring tension. Adjust the tension if necessary, following the manufacturer’s guidelines.
Next, use the remote or wall control to operate the door. Listen for any unusual noises, which could signal problems with the springs or other components. The door should open and close smoothly without jerking.
Finally, test the safety features, like the auto-reverse function, to confirm they’re working correctly. This thorough check will give you peace of mind, knowing your garage door is safe and reliable.
Wrap-Up
By following these essential tips, you can ensure a safe and effective garage door spring replacement. Have you considered how a well-functioning garage door impacts your daily routine? Taking the time to understand the process and prioritizing safety protects you and extends the lifespan of your garage door system. Remember, proper installation and testing are key to smooth operation, so don’t rush—your diligence today will pay off tomorrow.
Recent Posts
Why Follow This Garage Door Installation Guide?
When installing a garage door, a small mistake like misaligning the tracks can lead to
3 Best Steps for Garage Door Installation
Did you know that many homeowners tackle garage door installation themselves? This statistic highlights the
How to Install Your Garage Door: Step-by-Step Guide
Installing your garage door might sound like a challenging task, but with the right approach,