Contents
When replacing garage door springs, it’s important to approach the task with caution and precision, much like a skilled craftsman honing their craft. Before you set out on this important maintenance project, it’s vital to understand the intricacies involved in ensuring the safety of yourself and your property. Remember, a wrong move in handling garage door springs can lead to serious injuries or damage. So, let’s start by discussing the significant safety precautions you need to take, setting the foundation for a successful spring replacement process.
Key Takeaways
- Confirm proper safety gear: glasses, gloves, ladder.
- Release tension using winding bars.
- Identify spring type: extension or torsion.
- Remove old springs with caution.
- Install new springs correctly for door balance.
Safety Precautions
Before you begin replacing garage door springs, it’s vital to prioritize safety precautions. Garage door springs come in two main types: torsion springs, located above the closed door, and extension springs, located above the upper tracks on both sides of the door.
Confirming you have the proper safety gear is essential. Wear safety glasses to protect your eyes from any debris and sturdy gloves to safeguard your hands. Additionally, make certain you have a sturdy ladder that can support your weight and the weight of the garage door.
Injury prevention is key when working with garage door springs. Follow proper techniques to reduce the risk of accidents. Always release the tension in the springs before attempting any repairs or replacements. To do this, use winding bars and follow the manufacturer’s instructions carefully.
In case of an emergency, have a partner nearby who can assist you or call for help if needed.
Regular maintenance is vital to prevent unexpected issues with your garage door springs. Inspect the springs regularly for signs of wear and tear, such as gaps or fraying. Lubricate them as recommended by the manufacturer to confirm smooth operation.
Gather Necessary Tools
To efficiently replace garage door springs, you must gather the necessary tools before starting the task. Confirming you have the correct tools will make the process smoother and safer for you.
When dealing with garage door springs, it’s vital to prioritize tool safety to prevent accidents during the replacement process.
For torsion spring types, the essential tools you’ll need include winding bars, a socket wrench set, vice grips, a ladder, and safety glasses. These tools are necessary to safely and effectively handle torsion springs.
Make sure that your winding bars are the right size for your specific torsion springs to avoid any mishaps.
If your garage door uses extension springs, the tools required are a C-clamp, a ladder, safety glasses, a socket wrench set, and vice grips. These tools are important for safely removing and installing extension springs without causing any damage to your property or yourself.
Always remember to prioritize tool safety by wearing safety glasses to protect your eyes from any potential hazards.
Additionally, verify all tools are in good working condition before starting the replacement process to prevent any unexpected accidents.
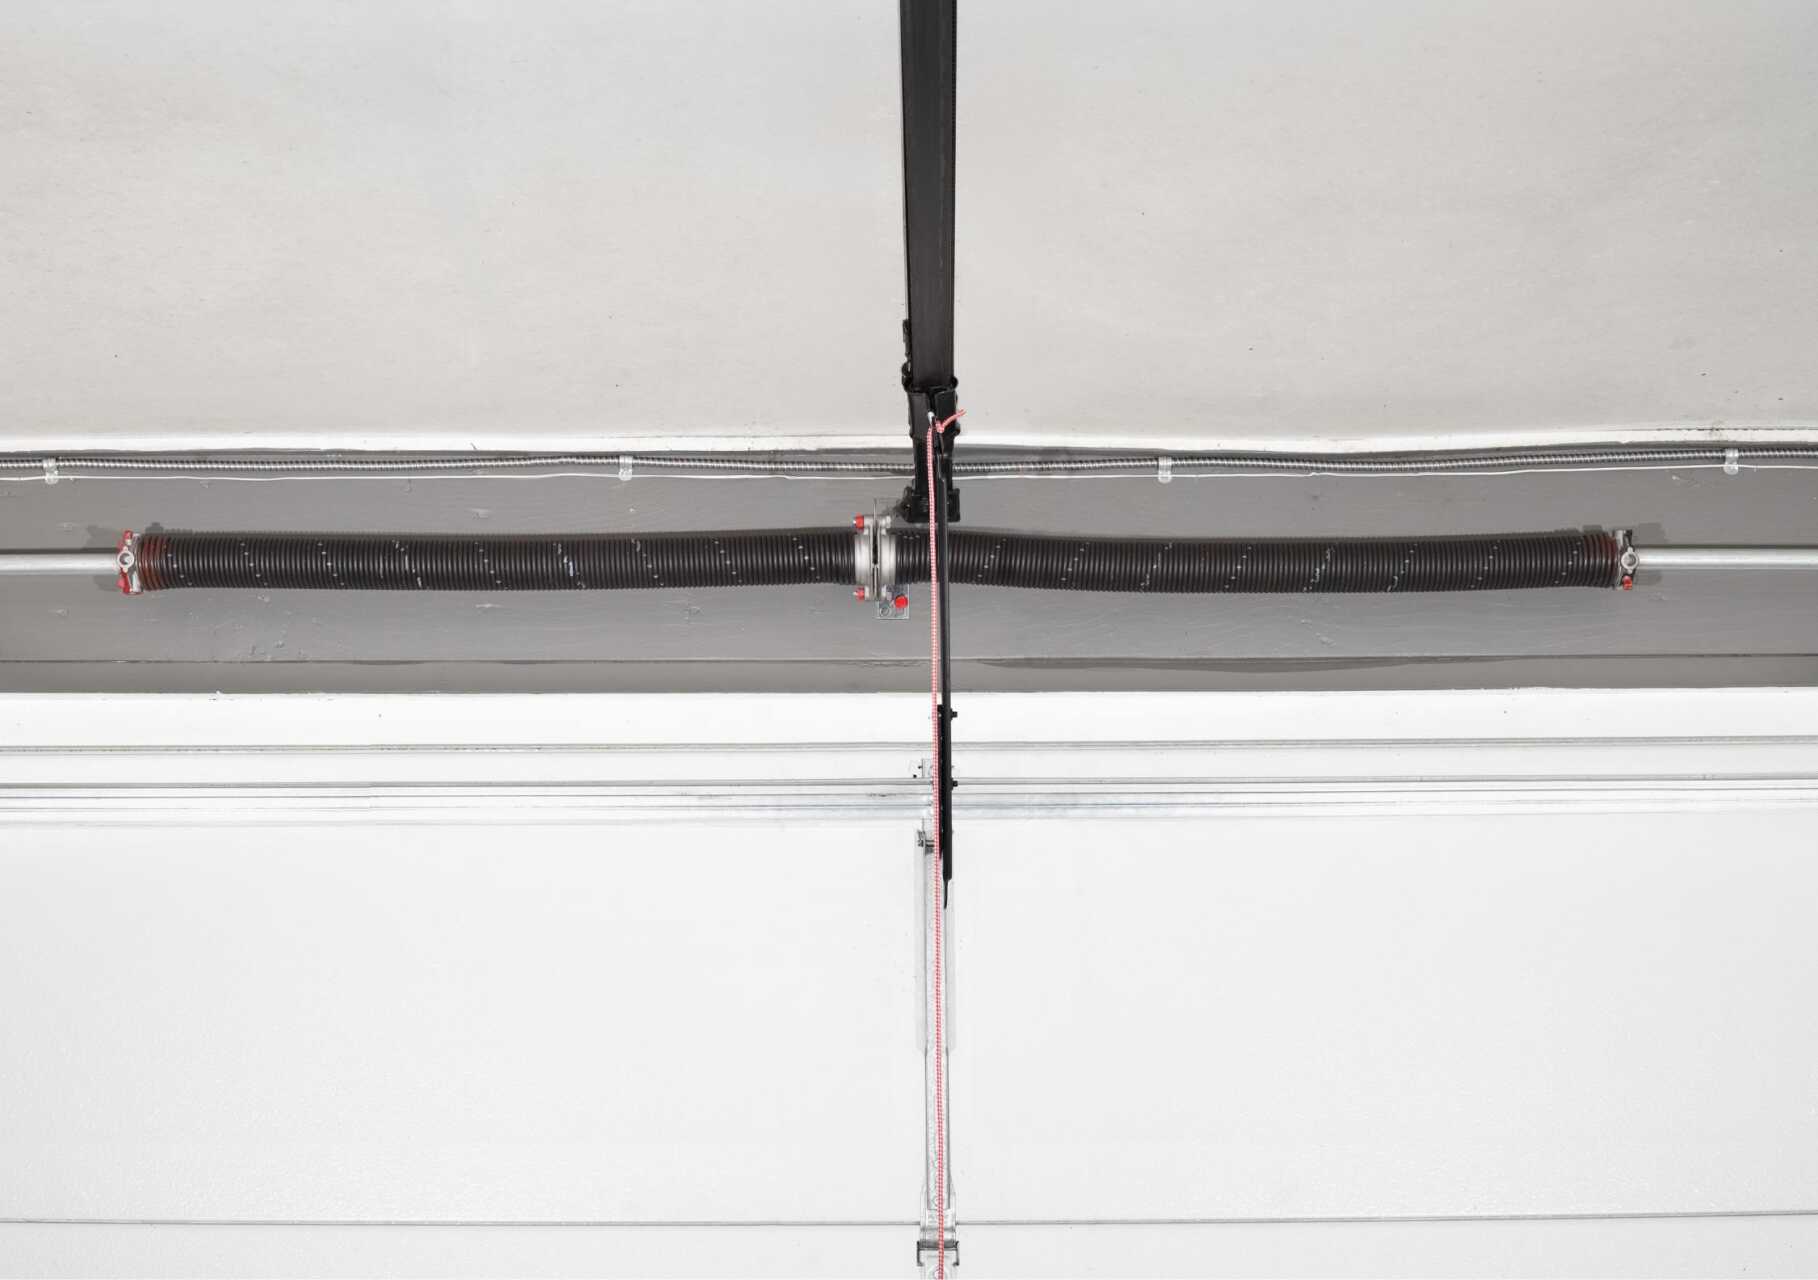
Identify Spring Type
When identifying the type of spring used in your garage door, you need to visually inspect the springs located above the door. Garage doors typically have two main types of springs: extension springs and torsion springs.
Extension springs run parallel to the horizontal tracks and stretch and contract to help lift the door. Torsion springs are located above the door when closed and twist to provide lifting force.
To determine the type of spring you have, look at the positioning and orientation of the springs. Extension springs are usually located on both sides of the door, while torsion springs are mounted on a metal rod above the door. Additionally, extension springs have safety cables running through them, while torsion springs do not.
Identifying the correct spring type is essential for proper spring maintenance and replacement. Extension springs typically have a lifespan of around 10,000 cycles, while torsion springs can last up to 20,000 cycles.
Understanding the type of spring in your garage door will help you choose the right replacement parts and ensure the longevity of your garage door system. If you’re unsure about the type of spring or need assistance, it’s recommended to consult a professional for guidance.
Release Tension From Springs
Having identified the type of spring in your garage door, the next step is to release the tension from the springs before attempting any maintenance or replacement.
Releasing the spring tension is essential for your safety and the proper handling of the garage door components. Before starting, verify you have the necessary tools like winding bars, safety goggles, and gloves.
To release the tension, first, close the garage door completely. Then, locate the winding cone at the end of the spring and insert the winding bars into the holes on the cone.
Slowly unwind the cone by turning the bars in the direction that opens the coils. Be cautious as the tension is released, and keep a firm grip on the winding bars.
Remember to follow all safety measures to avoid accidents. Never attempt to release the tension without the proper tools or experience.
If you’re unsure or uncomfortable with this step, it’s best to seek professional help. Once the tension is safely released, you can proceed to the next step of removing the old springs with confidence in your safety and the process.
Remove Old Springs
With the tension safely released from the garage door springs, the next step is to remove the old springs. Here are some tips to help you through this process:
Inspect the Springs: Before removing them, examine the old springs for any signs of wear, rust, or damage. This step will help you identify any common spring issues that may have led to their failure.
Secure the Area: Make sure the garage door is closed and secure to prevent accidents while removing the springs. Clear any obstructions around the working area to ensure a safe working environment.
Use Proper Tools: Have the necessary tools ready, such as winding bars, vise grips, and safety goggles. These tools will help you safely remove the old springs without any mishaps.
Follow Manufacturer Guidelines: Refer to the manufacturer’s instructions or online guides for specific spring maintenance tips and directions on removing the springs. This will ensure you’re following the correct procedures.
Seek Assistance if Needed: If you’re unsure or uncomfortable with removing the old springs, it’s always best to seek professional help. Don’t hesitate to ask for assistance to avoid any accidents or mistakes.
Install New Springs
For the installation of new springs, begin by positioning the first spring onto the anchor bracket. Make sure the stationary cone faces the center of the garage door. Slide the drum over the shaft and secure it in place.
Choose the appropriate spring type based on the weight of your garage door. For heavier doors, torsion springs are recommended, while extension springs work well for lighter doors.
When installing torsion springs, wind the spring tightly using winding bars, ensuring the winding is uniform to prevent imbalance. Extension springs should be secured to the track hanger with safety cables to prevent them from causing damage if they break.
Check the manufacturer’s instructions for specific installation tips, as methods can vary based on the model and brand of the springs.
Remember to always wear safety goggles and gloves during the installation process, as garage door springs are tightly wound and under high tension.
Once both springs are securely in place, test the balance of the door by manually lifting it halfway. The door should stay in place. If it moves, readjust the tension.
With the new springs installed correctly, your garage door should operate smoothly and efficiently.
Test Garage Door Operation
Now that you’ve installed new springs, it’s essential to test your garage door operation.
Begin by checking the door’s balance to make certain it opens and closes smoothly.
Verify that the door moves without any jerky or uneven motions to certify safe and effective functionality.
Check Door Balance
When checking the balance of your garage door, it’s vital to ensure its smooth operation and longevity.
To ensure proper garage door maintenance and maximize spring lifespan, follow these steps:
Visual Inspection: Look for any signs of wear, rust, or damage on the springs and hardware.
Manual Operation Test: Disconnect the automatic opener and lift the door manually to check for smooth movement.
Balance Test: Raise the door halfway and let go. It should stay in place. If it moves up or down, the balance might be off.
Torsion Spring Adjustment: If the door is imbalanced, adjust the tension on the torsion springs accordingly.
Professional Inspection: If you’re unsure about the door’s balance or encounter any issues, seek a professional for a thorough inspection.
Checking and maintaining the balance of your garage door is vital for its functionality and longevity.
Make certain to perform these checks regularly to keep your garage door operating smoothly.
Verify Smooth Movement
To verify the smooth movement of your garage door, conduct a thorough test of its operation. After completing the spring maintenance and confirming proper door alignment, it’s vital to ensure that your garage door moves smoothly.
Begin by manually opening and closing the door to check for any resistance or jerky movements. Listen for any unusual sounds that may indicate a problem with the springs or other components.
Next, activate the automatic opener to test the door’s movement. Observe if the door opens and closes evenly without any delays or hitches. Check the speed of the door and confirm it moves at a consistent pace throughout the operation.
If you notice any issues during the test, such as the door getting stuck or moving unevenly, it may indicate a need for further adjustments or repairs.
Regularly verifying the smooth movement of your garage door is essential for its longevity and safe operation. By conducting these tests, you can identify any issues early on and address them promptly to prevent costly repairs in the future.
Summary
You’ve successfully replaced your garage door springs and ensured the safety and functionality of your garage door system. Just like a well-oiled machine, your garage door is now ready to smoothly open and close with ease. Remember to regularly maintain your springs to keep them in top condition and enjoy the convenience of a reliable garage door for years to come. Keep up the great work!
Recent Posts
5 Tips for Inexpensive Custom Garage Door Installation
Installing a custom garage door can feel like steering through a maze—you want the perfect
Why Choose Affordable Garage Door Options?
Choosing an expensive garage door might seem like a smart investment, but opting for affordable
What Are the Best Custom Garage Door Options?
Have you ever wondered what really makes a custom garage door stand out? The best