Contents
Installing your garage door might sound like a challenging task, but with the right approach, it can be straightforward. Start by gathering the necessary tools and materials, ensuring you’re equipped for each step. Accurate measurements are essential for a proper fit, so don’t overlook this detail. As you choose the ideal garage door type, consider both functionality and aesthetics. Understanding these steps will set the foundation for a successful installation. Let’s explore what comes next.
Key Takeaways
- Gather essential tools and materials, including a power drill, level, and high-quality tracks and panels for installation.
- Measure your garage door opening accurately at multiple points for a snug fit and record the dimensions.
- Choose the right garage door type based on functionality, aesthetics, and material durability, considering options like steel and wood.
- Install the track and roller system, ensuring everything is plumb and level for smooth door operation.
- Test the garage door thoroughly for proper operation and make final adjustments to ensure balance and alignment.
Gather Necessary Tools and Materials
Before you start installing your garage door, gather all the necessary tools and materials to ensure a smooth process.
Begin with your tool checklist; you’ll need a power drill, a socket set, a level, a tape measure, and safety glasses. Make sure you’ve also got screwdrivers, wrenches, and a hammer on hand.
Proper material selection is essential, too. Choose high-quality tracks, springs, and panels suited for your garage’s dimensions. If you’re opting for an automatic door, don’t forget the opener and remote controls. Your choices matter, as they affect both functionality and durability.
Having a designated workspace with your tools and materials organized will streamline the installation process. This preparation enhances efficiency while fostering a sense of community among fellow DIY enthusiasts who appreciate the value of meticulous planning.
Measure Your Garage Door Opening
To ensure a proper fit for your new garage door, accurately measuring your garage door opening is vital. Start by measuring the width of the opening at three points: the top, middle, and bottom. Take the smallest measurement to make sure a snug fit.
Next, measure the height from the floor to the header, again checking at both sides and the center. This will help you determine the garage dimensions you need.
Also, consider the depth of your garage; this will influence the type of door you can install. Use a level to make certain your measurements are straight and true, as precise measuring is essential for a successful installation.
Finally, jot down your measurements clearly, as they’ll guide your selection process. By following these steps, you’re setting yourself up for a hassle-free installation, making sure your new door fits perfectly in your space.
Choose the Right Garage Door Type
When selecting a garage door, you need to evaluate both the types of garage doors available and the materials they’re made from.
Options range from traditional raised-panel doors to modern, sleek styles, each offering distinct benefits.
Additionally, material choices like steel, wood, and fiberglass impact durability, maintenance, and insulation, so weigh these factors carefully.
Types of Garage Doors
Choosing the right garage door type is essential for enhancing your home’s functionality and curb appeal. You’ll want to evaluate various options that suit your lifestyle and aesthetic preferences.
Roll-up doors: Ideal for tight spaces and easy access.
Sectional doors: Offer versatility and insulation options for energy efficiency.
Tilt-up doors: Provide a classic look with simple mechanics.
Custom designs: Allow for personalization, blending in seamlessly with your home’s style.
When weighing wood vs metal, think about durability, maintenance, and appearance. Metal doors are often stronger, while wood provides a warm, traditional feel.
Don’t forget to explore insulated options, particularly if temperature control is a priority in your garage space.
Material Considerations
Selecting the right material for your garage door has a vital impact on its performance and longevity. When comparing steel vs aluminum, consider durability and maintenance.
Steel doors are robust and resistant to dents, making them ideal for high-traffic areas. On the other hand, aluminum is lightweight and resistant to rust, but it may not provide the same level of strength as steel.
Insulation options also play an essential role in energy efficiency. Insulated steel doors can greatly reduce energy costs, while aluminum doors typically offer less insulation but can be equipped with insulation kits.
Evaluate your climate and needs carefully to choose the best material that enhances your home’s aesthetics and functionality. Remember, a well-chosen door protects your garage and elevates your home’s value.
Prepare the Garage Door Frame
Before installing your garage door, you need to prepare the frame properly.
Start by measuring the frame dimensions to ensure a perfect fit for your new door.
Next, clear away any debris and obstructions that could interfere with the installation process.
Measure Frame Dimensions
Accurate measurements are essential when preparing the garage door frame, as even slight discrepancies can affect the door’s performance and fit.
To ensure your installation goes smoothly, use proven frame measurement techniques and prioritize precise measurements.
Follow these steps to get started:
- Measure the width and height of the opening at multiple points.
- Check for any irregularities or unevenness in the frame.
- Record measurements in a notebook for easy reference.
- Double-check each measurement to confirm accuracy.
Clear Debris and Obstructions
To ensure a seamless installation, clear debris and obstructions from the garage door frame.
Start by inspecting the area around the frame for any dirt, leaves, or other materials that may hinder proper alignment. Use a broom or vacuum for thorough debris removal, ensuring you reach all corners.
Next, check for any tools or forgotten items nearby that could obstruct the installation. Remove these as part of your obstruction prevention strategy.
If you notice any rust or damage on the frame, address it before proceeding. Maintaining a clean, clear space facilitates installation and promotes the longevity of your garage door system.
Taking these steps fosters a sense of accomplishment and belonging in your DIY journey.
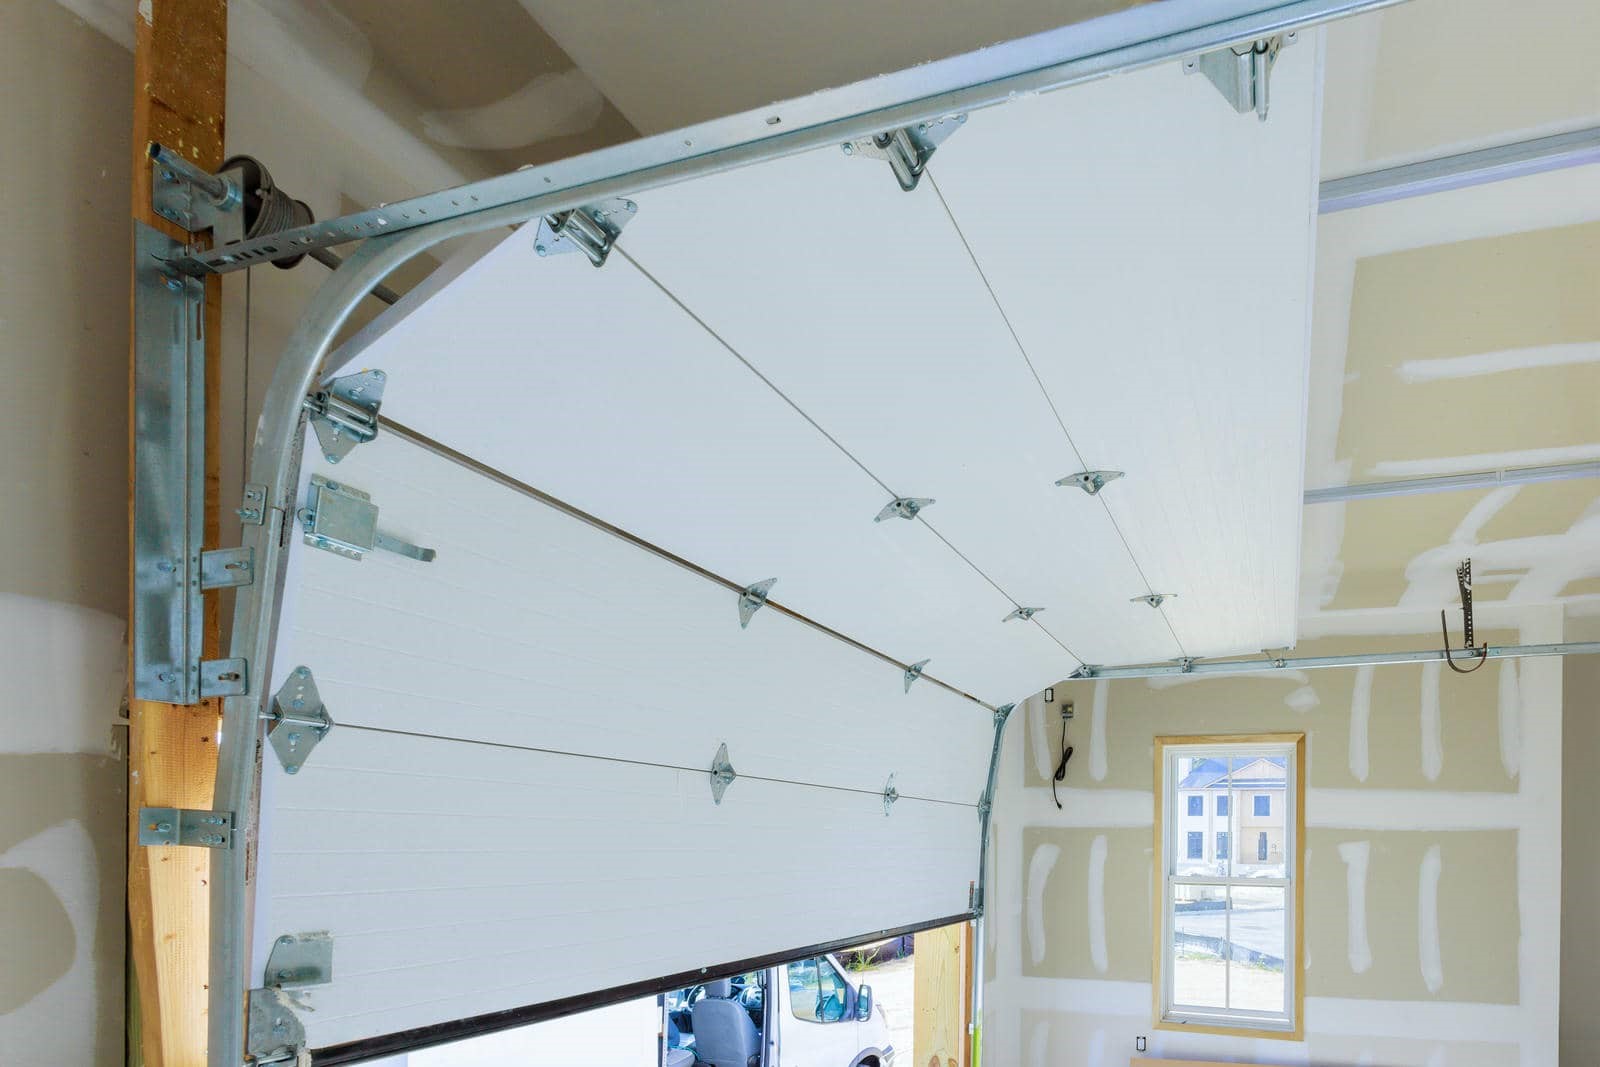
Install the Track and Roller System
Begin by carefully positioning the vertical tracks along each side of the garage door frame. Verify the tracks are plumb and level, as proper track alignment is essential for smooth operation. Secure the tracks to the frame with lag screws, checking for any misalignment as you go.
Next, install the horizontal tracks, verifying they slope slightly downward towards the garage’s interior. This helps with drainage and prevents water accumulation.
Finally, insert the rollers into the tracks and attach them to the door panels. Don’t forget to apply roller lubrication for peak performance and longevity.
- Use a level to confirm vertical track alignment.
- Tighten all screws securely to prevent movement.
- Verify the rollers glide smoothly within the tracks.
- Regularly check and maintain roller lubrication for continued efficiency.
With these steps, you’ll set the foundation for a fully functional garage door system.
Attach the Garage Door Panels
With the track and roller system securely installed, it’s time to attach the garage door panels. Start by laying the first panel in the opening, ensuring it’s level. Use a helper to lift the panel if needed, as alignment is vital.
Next, secure the hinges at the ends of the panel. For hinge installation, align the hinge holes with the predrilled spots on the panel and insert the screws. Tighten them firmly without over-torquing.
Once the first panel is attached, proceed to the next one. Position it against the first, ensuring proper panel alignment. Install the hinges connecting the two panels, maintaining a straight line throughout.
Repeat this process for the remaining panels, checking alignment regularly to avoid misalignment issues. Completing this step meticulously will ensure smooth operation of your garage door and lay a solid foundation for the final stages of installation.
Install the Garage Door Opener
Once you’ve secured the garage door panels, installing the garage door opener is your next crucial step.
Begin by selecting an opener with essential garage door opener features like quiet operation and smart technology compatibility. Position the opener on the ceiling, making sure it’s centered above the door.
Here are some installation safety tips to keep in mind:
- Disconnect power before starting to avoid accidents.
- Use a sturdy ladder to reach high points safely.
- Securely attach brackets to prevent the opener from falling.
- Follow the manufacturer’s manual for precise wiring and assembly.
Once everything is in place, connect the power and test the opener.
This process enhances your garage’s functionality and ensures your family’s safety.
Enjoy the convenience of a smoothly functioning garage door opener, and take pride in your accomplishment!
Connect the Safety Sensors
Connecting the safety sensors is an essential step in ensuring your garage door operates safely.
Begin by locating the safety sensors, typically mounted on either side of the door, about six inches above the ground. Verify both sensors are aligned directly opposite each other; improper safety sensor alignment can prevent the garage door from closing.
Next, use appropriate sensor wiring techniques to connect the sensors to the garage door opener. Start by stripping the ends of the wires, then connect them to the terminals marked for safety sensors. Make certain to follow the color-coding; usually, the white wire goes to the same terminal on both sensors.
Once the wiring is secured, double-check all connections to avoid any malfunctions.
Test the Garage Door Operation
Testing the garage door operation is essential to confirm it functions correctly and safely. After installation, you’ll want to conduct thorough garage door testing to ascertain that everything runs smoothly.
Follow these steps for effective operation troubleshooting:
Check the remote control: Verify it’s functioning by testing the signal from various distances.
Observe the door movement: Watch for any jerky motions or unusual noises while opening and closing.
Test the safety sensors: Block the sensors to verify they stop the door’s descent.
Inspect the door balance: Manually lift the door halfway; it should remain in place without assistance.
Final Adjustments and Maintenance Tips
As you wrap up the installation process, making final adjustments and establishing a maintenance routine are crucial to ensuring your garage door operates efficiently over time.
Start by employing adjustment techniques to fine-tune the door’s balance and alignment. Check the tension on the springs; if it’s too tight or loose, adjust accordingly to prevent strain on the opener.
Next, inspect the rollers and tracks for debris, and lubricate them with silicone spray to ensure smooth operation.
Create a maintenance schedule that includes regular checks every few months. During these checks, look for signs of wear on cables, hinges, and other moving parts.
Testing the auto-reverse feature should also be part of your routine; it’s essential for safety.
Frequently Asked Questions
What Is the Average Cost of a Garage Door Installation?
The average installation costs for a garage door range from $500 to $1,500, depending on the garage door type. Factors like materials, size, and labor can affect pricing, so it’s wise to compare options before deciding.
Can I Install a Garage Door Alone, or Do I Need Help?
You can tackle a garage door installation solo, but it’s often safer and more efficient with professional assistance. Weigh the benefits of independence against the ease of team support before deciding your approach.
How Long Does It Typically Take to Install a Garage Door?
Typically, you’ll find a garage door installation takes about four to six hours, depending on your labor efficiency and experience. Planning ahead can streamline your installation timeline, ensuring a smoother process for you.
What Safety Precautions Should I Take During Installation?
Before you start, assess the risks involved. Wear appropriate safety gear, like gloves and goggles. Confirm the workspace is clear, and never underestimate the importance of following manufacturer guidelines to prevent accidents during installation.
Do I Need a Permit to Install a Garage Door?
Yes, you’ll likely need a permit to install a garage door, depending on local building codes. Check regulations for specific garage door types to ensure compliance and avoid potential fines or issues during installation.
Final Thoughts
Installing your garage door can enhance your home’s curb appeal and security. By following the steps outlined, you ensure a proper installation and bolster your home’s safety. Regular maintenance after installation can prolong the life of your garage door, so keep up with adjustments and inspections. With the right approach, you’ll enjoy smooth operation and peace of mind for years to come.
Recent Posts
Why Follow This Garage Door Installation Guide?
When installing a garage door, a small mistake like misaligning the tracks can lead to
3 Best Steps for Garage Door Installation
Did you know that many homeowners tackle garage door installation themselves? This statistic highlights the
Why Choose Affordable Garage Door Opener Help?
Why put off garage door issues when affordable help is just a call away? Choosing