Contents
Most people don’t realize that garage door springs are under immense tension and can be dangerous if not handled properly. Before you attempt a replacement, it’s essential to understand the different types of springs and the tools you’ll need. Safety precautions are non-negotiable in this process. Are you ready to learn how to replace your garage door springs safely and effectively?
Key Takeaways
- Gather necessary tools like a socket wrench, winding bars, and safety goggles before starting the replacement process.
- Ensure the garage door is fully closed and secured before unwinding the old spring.
- Carefully unwind the spring using a winding bar and unbolt it from the brackets once slack.
- Make gradual adjustments to the new spring tension, checking the door’s balance after each change.
- Conduct regular inspections and maintenance to prolong the lifespan of the garage door springs.
Understanding Garage Door Springs
Garage door springs are the vital components that bear the weight of your garage door, making it easy to open and close. Understanding spring functionality is important for maintaining your door’s performance.
These springs store energy and release it when you operate the door, allowing it to move smoothly. Over time, the springs can wear out, affecting their performance and the door’s operation.
To maximize their lifespan, regularly inspect your springs for signs of wear, such as rust or gaps. If you notice any issues, it’s best to replace them promptly to avoid more extensive damage.
When you know how these springs work, you’ll feel more empowered taking care of your garage door. Remember, a well-maintained spring enhances the door’s functionality and ensures safety for you and your loved ones.
Taking these steps will help you foster a sense of belonging within your home.
Types of Garage Door Springs
When it comes to garage door springs, you typically encounter two main types: torsion springs and extension springs.
Torsion springs are mounted above the door and provide balance and support as the door opens and closes, while extension springs are located on either side and stretch to lift the door.
Understanding these differences is essential for effective replacement and maintenance, so let’s break them down.
Torsion Springs Overview
If you’re considering a garage door spring replacement, understanding the different types of springs, especially torsion springs, is vital for a successful job.
Torsion springs are typically mounted above the door, using torsion spring mechanics to lift and lower it smoothly. They work by storing energy as they twist, creating spring tension that supports the door’s weight.
When the door closes, the springs unwind, and when it opens, they wind up, providing the necessary lift. It’s important to assess the condition of your torsion springs carefully, as they bear significant weight and tension.
Improper handling can lead to injury, so always prioritize safety and consider seeking professional help if you’re unsure about any step in the replacement process.
Extension Springs Explained
Extension springs play a significant role in the operation of many garage doors, offering a different mechanism than torsion springs.
Understanding extension spring mechanics is important for a smooth garage door operation. These springs stretch and contract as you open and close the door, counterbalancing its weight.
It’s important to check their condition regularly, as an extension spring’s lifespan typically ranges from 7 to 14 years, depending on usage and maintenance. If you notice unusual noises or difficulty in door movement, it might be time to replace them.
Always verify you’re using the correct size and type for your door. By keeping your extension springs in top shape, you’re not just maintaining your garage door; you’re enhancing your home’s safety and functionality.
Safety Precautions Before Starting
Before you start replacing your garage door springs, it’s essential to gear up with the right personal protective equipment, like safety goggles and gloves.
Verify you have all the necessary tools on hand, such as a socket wrench and winding bars, to ensure a smooth process.
Taking these safety precautions will help prevent injuries and make your project more efficient.
Personal Protective Equipment
Safety is paramount when tackling a garage door spring replacement, so don’t overlook the importance of personal protective equipment (PPE). Wearing the right gear protects you and makes the task safer for everyone involved. Here are essential items you’ll need:
| PPE Item | Purpose |
|---|---|
| Safety Goggles | Protects your eyes from debris |
| Gloves Required | Shields your hands from sharp edges |
| Steel-Toed Boots | Protects your feet from heavy falls |
| Dust Mask | Prevents inhalation of particles |
Before you plunge in, verify you’ve got these pieces of equipment on. It’ll help create a safer working environment and minimize the risk of injury. Stay safe and enjoy the process!
Proper Tools Required
Having your personal protective equipment in place is just the first step to ensuring a safe garage door spring replacement.
Next, gather the proper tools. You’ll need winding bars, a socket wrench, and pliers to manage spring tension effectively. A ladder will help you reach those high spots safely. If you’re working with torsion springs, a measuring tape is essential for evaluating spring durability and ensuring accurate replacements.
Don’t forget a sturdy workbench to organize your tools and parts. By having these tools ready, you’ll enhance your confidence and capability throughout the process.
Tools Needed for Replacement
To successfully replace your garage door springs, you’ll need a few essential tools that will make the process smoother and safer.
First, grab a sturdy ladder to help you reach the springs, and wear safety goggles to protect your eyes. A socket wrench set is vital for loosening and tightening nuts on various spring types.
You’ll also need a winding bar, which is specifically designed for safely winding the springs, along with pliers for additional grip. Don’t forget a sturdy workbench to manage your tools and springs comfortably.
Finally, having a tape measure handy ensures accurate measurements, especially if you’re considering replacement costs for new springs.
With these tools, you’ll be well-equipped to tackle your garage door spring replacement with confidence and skill, making you feel accomplished as part of the DIY community.
Removing the Old Garage Door Spring
Now that you’ve gathered your tools, it’s time to remove the old garage door spring. Start by ensuring your garage door is fully closed and secured.
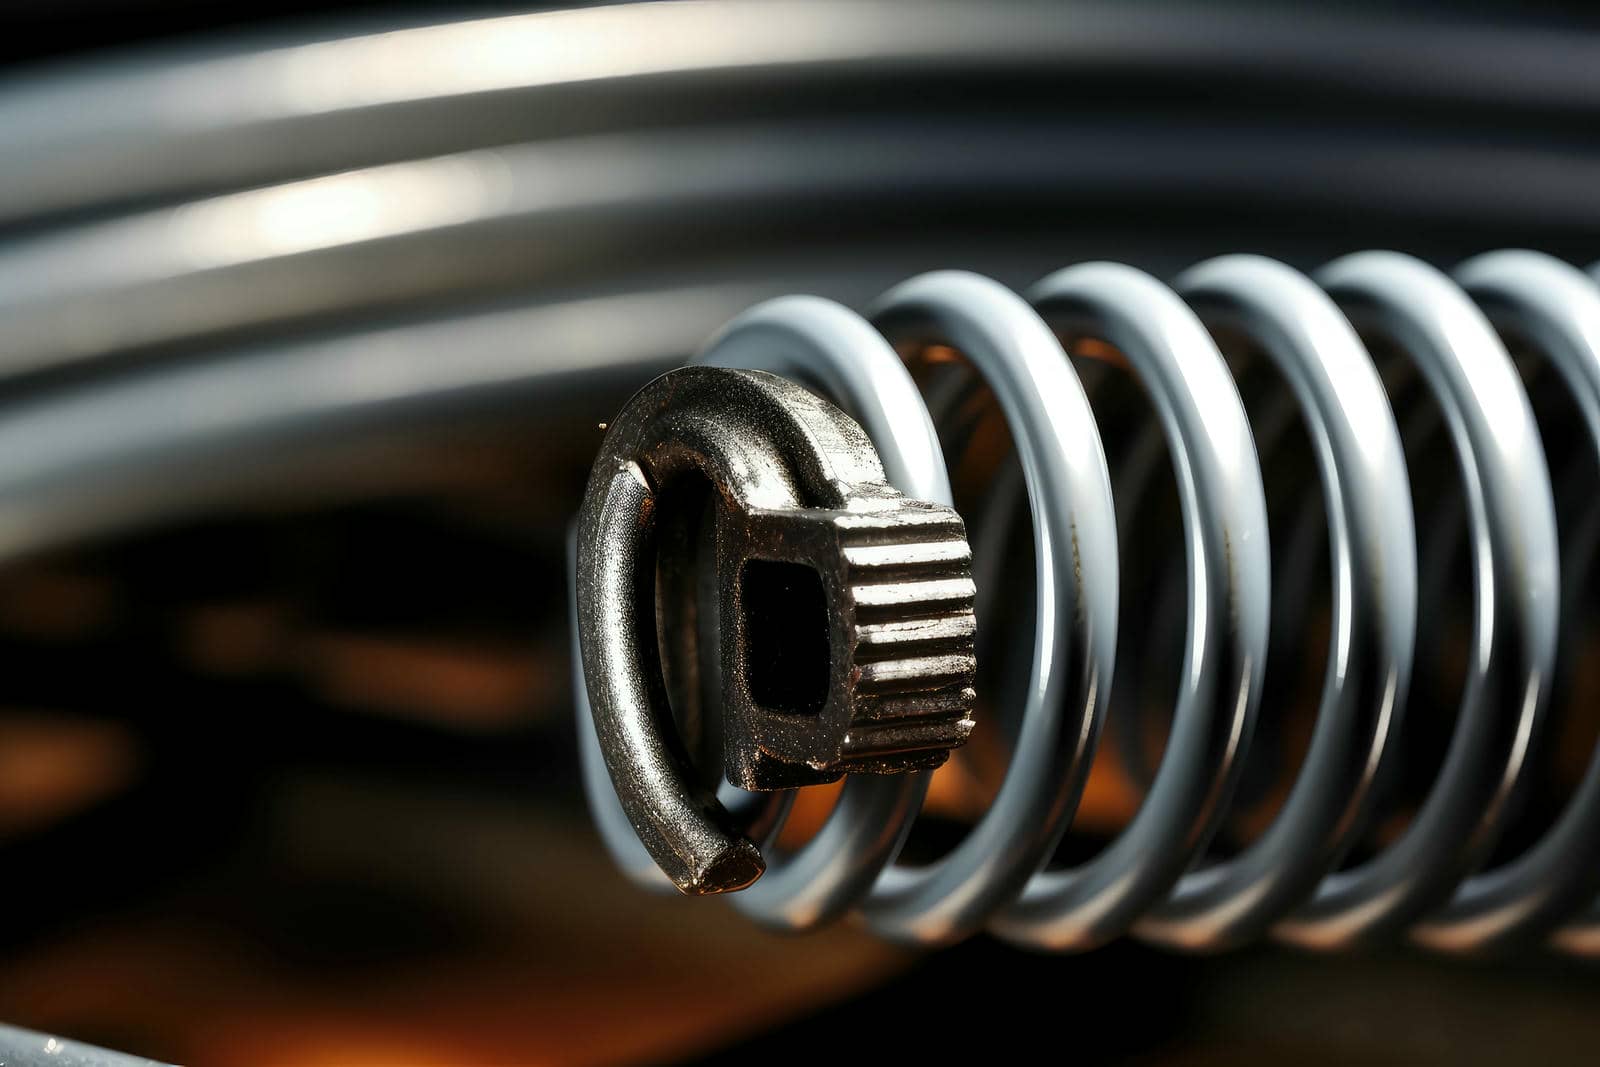
Use a winding bar to carefully unwind the spring, following safe spring removal techniques. Insert the bar into the winding cone, turn it counterclockwise, and repeat this process until the tension is released. Once the spring is slack, you can unbolt it from the brackets.
Remember to take your time; rushing can lead to accidents.
After removing the spring, think about old spring disposal. Many local waste management facilities accept metal for recycling, so check their guidelines.
Safely wrap the spring to avoid injury and transport it to the designated recycling location. By doing this, you’re finishing your project and making a responsible choice for the environment.
You’re one step closer to revitalizing your garage door!
Installing the New Garage Door Spring
Begin the installation of your new garage door spring by carefully positioning it in the brackets. Make sure the spring is seated securely to prevent any mishaps.
Next, you’ll want to attach the winding cone to the end of the spring, ensuring it’s aligned properly with the shaft. Use a wrench to tighten the set screws on the winding cone, making sure they grip the shaft firmly.
Once the spring is secured, repeat this process for the other side if you’re working with a dual-spring system. Double-check that both springs are evenly spaced and correctly positioned. This is essential for balanced operation.
Take a moment to review your work before moving on; a good installation lays the foundation for smooth operation.
Tension Adjustment Techniques
With your new garage door springs securely installed, adjusting their tension becomes the next essential step. Proper spring adjustments ensure your garage door operates smoothly and safely.
Here are some effective tension techniques to guide you:
Identify the adjustment points: Locate the winding cone and the set screws on your springs.
Use the right tools: Grab a wrench and a sturdy ladder to reach the springs easily.
Make gradual adjustments: Turn the set screws a quarter turn at a time, checking the door’s balance after each adjustment.
Test the door’s motion: Open and close the door a few times to ensure it moves freely without sticking or wobbling.
Testing the Garage Door Functionality
How can you ensure that your garage door functions properly after replacing the springs? Start by performing a thorough spring testing.
First, manually lift the door halfway; it should remain in place without drifting up or down. This checks the balance and confirms your springs are correctly tensioned.
Next, use the opener to raise and lower the door. Listen for any unusual sounds like grinding or squeaking, which could indicate misalignment or other issues.
Observe how smoothly the door moves. If it hesitates or struggles, you may need to adjust the springs or the tracks.
Finally, test the safety features by placing a small object in the door’s path. The door should reverse upon contact, confirming its functionality.
Maintenance Tips for Garage Door Springs
Although garage door springs are designed to last for several years, regular maintenance is essential to secure their longevity and safe operation.
By following these simple tips, you can keep your springs in top shape:
Perform regular inspections: Check for any signs of wear or rust every few months to catch issues early.
Apply spring lubrication: Use a silicone-based lubricant on the springs to reduce friction and prevent corrosion.
Examine the cable and pulleys: Verify they’re in good condition and not fraying, as they work closely with the springs.
Watch for unusual noises: Any creaking or popping sounds might indicate a problem that needs immediate attention.
Recap
Replacing garage door springs isn’t just a DIY task; it’s an essential safety measure. Many believe that springs can last indefinitely, but they actually have a limited lifespan, often around 10,000 cycles. Regularly checking and maintaining them can prevent accidents and costly repairs. By following this guide, you’ll ensure your garage door operates smoothly and extend the life of your springs. Stay proactive, and your garage door will serve you well for years to come.
Recent Posts
Why Choose Top Garage Door Installation Experts?
Did you know that a poorly installed garage door can lead to safety hazards and
7 Tips for Choosing Top Garage Door Installers
Selecting the right garage door installer can greatly impact your home’s security and curb appeal,
Why Follow This Garage Door Installation Guide?
When installing a garage door, a small mistake like misaligning the tracks can lead to