Contents
When it comes to garage door spring repair, understanding the specifics can make all the difference. Knowing the types of springs and prioritizing safety precautions are essential first steps. You’ll need the right tools and a clear diagnosis of any issues before proceeding. But what happens if repairs don’t go as planned? Explore expert tips to ensure your garage door operates smoothly and safely for years to come.
Key Takeaways
- Always disconnect the garage door opener and wear safety goggles and gloves to prevent injuries during repairs.
- Identify the type of spring (torsion or extension) to ensure proper replacements and repairs.
- Regularly inspect and lubricate springs every six months to prolong their lifespan and maintain functionality.
- Listen for unusual noises or check for door misalignment as signs of spring issues needing immediate attention.
- If uncertain about repairs or the extent of damage, consult a professional for safety and effective solutions.
Understand the Types of Garage Door Springs
Garage door springs play an essential role in the smooth operation of your garage door, and understanding their types can save you time and money during repairs.
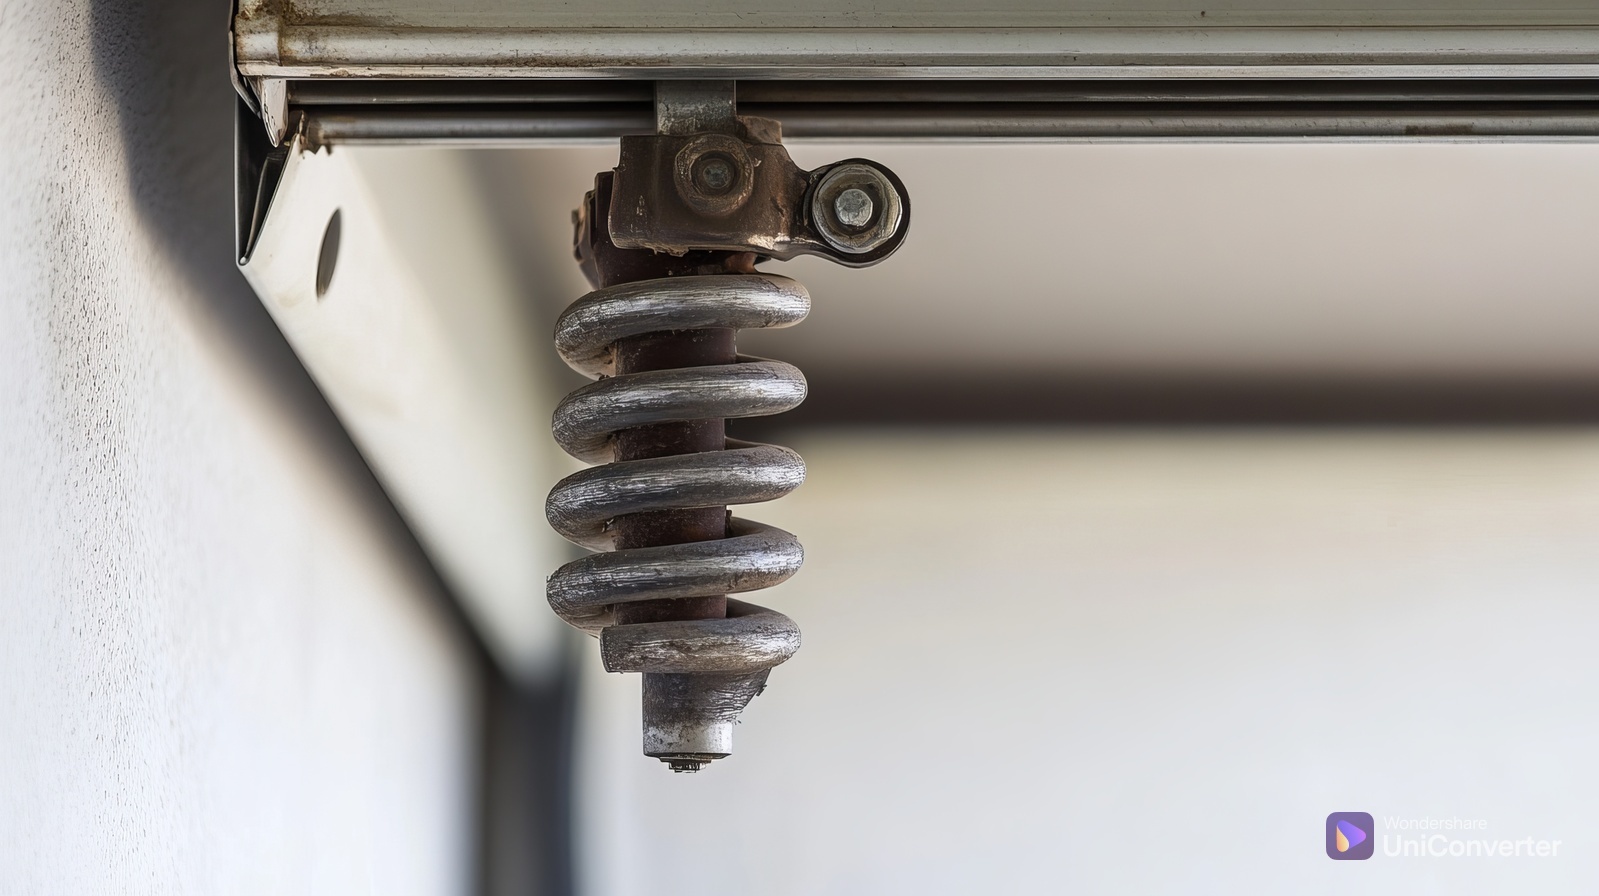
The two main types of springs you’ll encounter are torsion springs and extension springs, each suited for different garage door types. Torsion springs are mounted above the door and use a twisting motion, providing greater lifting power and durability. They’re typically found on heavier doors.
On the other hand, extension springs stretch alongside the tracks, making them ideal for lighter garage door types. Knowing these spring mechanisms helps you identify the right replacement when issues arise.
Regularly inspecting your springs for wear can prevent costly repairs down the line. By familiarizing yourself with these types, you’ll be better equipped to maintain your garage door’s functionality and enhance your home’s security.
Safety First: Precautions to Take
Before you start any garage door spring repair, it’s crucial to prioritize safety. Garage door springs are under significant spring tension, and a sudden release can cause serious injury. Always wear safety goggles and gloves to protect yourself from debris and potential hazards.
Verify you’ve disconnected the garage door opener to prevent accidental activation while you’re working. Maintain safety awareness by having a buddy assist you. They can provide support and help in case of an emergency.
When handling springs, use appropriate tools, and never attempt to adjust or remove a spring without proper knowledge; it’s best to consult a professional if you’re uncertain.
Lastly, keep your workspace tidy and free of obstacles. This minimizes the risk of accidents and allows you to focus on the repair task at hand. Prioritizing these safety measures will help you complete your garage door spring repair effectively and without incident.
Gather the Necessary Tools and Materials
Before you start your garage door spring repair, you need to gather the right tools and materials.
Essential tools include a winding bar, socket wrench, and pliers, while safety gear like gloves and goggles is vital to protect yourself.
Having everything ready will streamline the repair process and ensure your safety.
Essential Tools Required
To tackle garage door spring repairs effectively, you’ll need to gather a few essential tools and materials.
First, make certain you have a set of wrenches and sockets that match your spring types, as different systems require specific sizes. A sturdy pair of pliers will help with gripping and twisting wires during repair techniques.
You’ll also need a winding bar, which is vital for safely adjusting torsion springs. Don’t forget a durable ladder for easy access to high garage doors.
Additionally, having a tape measure and a level will help ensure precise alignment and tension.
With these tools in hand, you’ll be well-prepared to handle your garage door spring repair confidently and efficiently.
Safety Gear Importance
When working on garage door spring repairs, the importance of safety gear can’t be overstated. Using the right protective equipment is essential for your safety and injury prevention.
Start with safety goggles to shield your eyes from flying debris and gloves to protect your hands from sharp edges. A sturdy pair of work boots with slip-resistant soles will help maintain your footing while working.
Consider wearing a hard hat, as springs can snap and cause serious injury. Keep your workspace organized to minimize hazards, and always make sure you have a first aid kit on hand.
Diagnosing Spring Issues
As you assess your garage door’s performance, identifying spring issues becomes essential to ensuring safe and reliable operation.
Start by observing how your door behaves. Common symptoms can help you pinpoint spring problems.
Utilize these troubleshooting techniques to guide your diagnosis:
Listen for Noises: Unusual sounds, like squeaking or grinding, may indicate spring strain.
Check Door Movement: If the door doesn’t open or close smoothly, it might be a sign of spring failure.
Inspect for Visible Damage: Look for gaps or breaks in the springs, which can signal that they need immediate attention.
Step-by-Step Guide to Replacing Torsion Springs
Before you start replacing torsion springs, it’s essential to prioritize safety.
Gather the necessary tools, including a winding bar, safety glasses, and a socket set, to ensure a smooth process.
Understanding these initial steps will set you up for a successful replacement.
Safety Precautions First
Although replacing torsion springs can be a rewarding DIY project, it’s important to prioritize safety throughout the process.
Working with spring tension can be hazardous, so taking precautions is vital. Here are some key safety tips to keep in mind:
Always wear safety gear, including goggles and gloves, to protect yourself from potential injuries.
Make sure to release all tension from the springs before attempting any repairs or replacements.
Keep children and pets away from the workspace to avoid accidents.
Tools Required for Replacement
With safety precautions in place, you’re ready to gather the necessary tools for replacing torsion springs. You’ll need a sturdy torque wrench to manage spring tension accurately, along with a winding bar designed specifically for torsion springs.
A pair of safety glasses is vital to protect your eyes from potential hazards. Additionally, a socket set will help you remove and replace brackets, while pliers will assist with cable adjustments.
A ladder is essential for accessing high springs, and a tape measure ensures precise lengths. Having these tools on hand can notably reduce replacement costs, as a proper setup allows you to perform the repair efficiently and safely, giving you confidence in your skills and expertise.
Step-by-Step Guide to Replacing Extension Springs
Replacing extension springs on your garage door is an essential task that can enhance its functionality and safety. Follow these steps to ensure a successful replacement:
Release spring tension: Disconnect the garage door from the opener and carefully use a winding bar to release tension from the old extension springs.
Remove old springs: Unscrew the brackets securing the old extension spring and carefully remove it from its mounting points.
Install new extension springs: Position your new extension springs in place, confirming they’re correctly aligned, then secure them with the brackets.
Always wear safety goggles and gloves during this process.
Lubricating and Maintaining Springs
To ensure your garage door springs operate smoothly and last longer, regular lubrication and maintenance are essential.
Start by establishing a maintenance schedule; ideally, you should lubricate your springs every six months. Use a high-quality silicone or lithium-based lubricant specifically designed for garage doors. Apply it sparingly to the springs while avoiding excess, which can attract dirt and grime.
Inspect the springs for signs of wear, rust, or damage during maintenance. If you notice any issues, address them immediately to prevent further complications.
Remember, proper spring lubrication reduces friction, ensuring quiet and efficient operation.
Don’t forget to check other components, like rollers and hinges, as part of your routine. By keeping up with these tasks, you extend the life of your springs and enhance the overall performance of your garage door.
This commitment to maintenance fosters a safe and reliable home environment.
When to Call a Professional
How can you tell when it’s time to call a professional for garage door spring issues? While some repairs may seem manageable, it’s essential to recognize the signs of failure that indicate you should seek expert help.
Here are a few scenarios when to call a pro instead of trying to DIY:
You hear unusual noises, like loud bangs or creaks, when operating the door.
The door doesn’t open or close evenly, showing signs of misalignment.
You notice visible damage to the springs, such as rust or breaks.
Ignoring these indicators can lead to further complications or accidents.
If you find yourself facing any of these issues, it’s best to contact a qualified technician. They’ll make certain that your garage door is safe and functioning properly, giving you peace of mind.
Common Mistakes to Avoid
Garage door spring repairs can be tricky, and making mistakes during the process can lead to further complications. One common pitfall is ignoring proper safety precautions. Always disconnect the power and use safety glasses; otherwise, you might face serious injuries.
Another mistake is relying on repair myths, like believing that all springs have the same lifespan. Each type varies, and understanding this can save you from premature failures.
Conducting a mistake analysis before starting your repair is essential. Assess your skills honestly—if you’re unsure, it’s often best to call a professional.
Avoid using the wrong tools; makeshift solutions can damage your door or lead to improper installation. Finally, don’t skip the adjustment phase after the repair. Proper alignment is key to smooth operation.
Regular Maintenance Tips for Longevity
While maintaining your garage door springs might seem like a minor task, regular upkeep is essential for their longevity and best performance.
By integrating simple practices into your routine, you can enhance their lifespan and ensure smooth operation. Here are key maintenance tips to follow:
Conduct regular spring inspections: Check for rust, wear, or any signs of damage at least twice a year. Early detection prevents bigger issues.
Perform routine lubrication: Use a silicone-based lubricant on the springs and other moving parts to reduce friction and wear. Avoid WD-40, as it can attract dirt.
Keep tracks clean: Ensure the tracks are free from debris and obstructions, allowing for smooth movement and reducing strain on the springs.
Recap
Understanding garage door springs and prioritizing safety can make repairs more manageable. With the right tools and knowledge, you can effectively tackle issues and extend the life of your springs. But when do you know it’s time to call a professional? Regular maintenance and early detection of problems are essential, so stay vigilant. By following these tips, you can ensure your garage door operates smoothly and safely for years.
Recent Posts
10 DIY Garage Door Opener Troubleshooting Tips
A malfunctioning garage door opener can be a frustrating experience, especially when you need to
Why Is My Garage Door Opener Malfunctioning?
If your garage door opener isn’t functioning properly, it can be frustrating and inconvenient. You
Enviromental Door | Reliable & Durable Commercial Garage Doors in Grandville
Enviromental Door proudly serves the Grandville area with a detailed range of commercial garage doors